ScheduleBot allows users to create events for a specified time. The Dota extension allows users to add inhouses to those events.
When the event happens, ScheduleBot automatically sets up a lobby and invites everyone who has signed up. Once all players have entered the lobby, ScheduleBot starts the game.
ScheduleBot supports many configuration options, such as time zone, server, or game mode. See below to learn how it works in detail:
ScheduleBot works with events. Events can be created by users by providing an event name and a time. The user can provide the time on their own time zone, and it will be converted to the server's. Events are created by using the "create" command.
The created event is still "barebones". It can be used to coordinate a pub match with your friends, but it won't set up a lobby just yet. In order to do so, an inhouse must be added to the event by using the "add-inhouse" command. The command also supports options such as the game mode and the lobby server.
The inhouse's setup is complete. Now people who have linked their steam account (See "Steam account linking process") can confirm their attendance using the "confirm" command. At the configured time, ScheduleBot will create the lobby and invite every user who signed up. Once ten people have joined the lobby, the game will automatically start. Alternatively, it can be manually started by using the "force-lobby-start" command.
Please do note that ScheduleBot can only host one inhouse at a time. Adding multiple inhouses for different events scheduled for the same time will result in unexpected behaviour. If you wish to have simultaneous inhouses, you'd need to run multiple instances of the bot.
ScheduleBot asks users to link their Steam account before being able to join any events. By running the command link-steam, users are redirected to ScheduleBot's Steam profile and asked to add it.
After being added, it sends a code that must be sent through Discord.
By doing this, ScheduleBot is able to invite the people who sign up to the lobby.
Most Discord bots provide hosting, so that you only need to add the bot to your server. ScheduleBot does not. This comes with the advantage of not having to rely on a third party server that could shut down at any time; with this approach you have complete control of your bot.
However, you will need to meet three prerequisites before using it:
A machine to host it: if you want the bot to be running 24/7, you will need a machine that
is always on. If you're willing to have your computer always on, then you can go ahead and follow
the Local Installation instruction. Not everyone can do that though. We could use a PaaS such
as Heroku, whose free plan is good enough for this bot. If you'd
rather do that, then follow the instructions at Deploying to Heroku.
A Discord bot account: you can create a Discord application
here. Just write a name and you're good to
go. After that, click Create a Bot User. Then click token: click to reveal and save it: you
will need it later.
A Steam account: the bots needs a Steam account to communicate with users, host lobbies and invite them. Don't use your Steam account for that; create a brand new one instead. Also it is recommended to keep Steam Guard on, as ScheduleBot supports it.
If you meet the prerequisites, go to Local Installation or Deploying to Heroku. If you'd
rather not use Heroku, you can follow the Local Installation instructions with your own provider.
To run ScheduleBot locally, you will need:
Start by cloning this repo, and then install the dependencies. In a command line (if you're on
Windows and have no idea what that means, open the Git Bash program that was installed with git),
do:
$ git clone https://github.com/MeLlamoPablo/schedulebot.git
$ cd schedulebot
$ npm install
Now make sure that postgres is running and launch the setup server by doing:
$ npm run setup
Enter your database settings. When asked if you want to connect over SSL, unless you have configured your postgres server to use it, you should say no. Then visit the setup site at http://localhost:3000. Follow the instructions in there.
Note: an .ENV file containing your database settings will be created at your bot's directory.
Do not delete it, as it's needed by the bot to work.
Once you click the Deploy Bot button, you can run then your bot with:
$ npm run bot
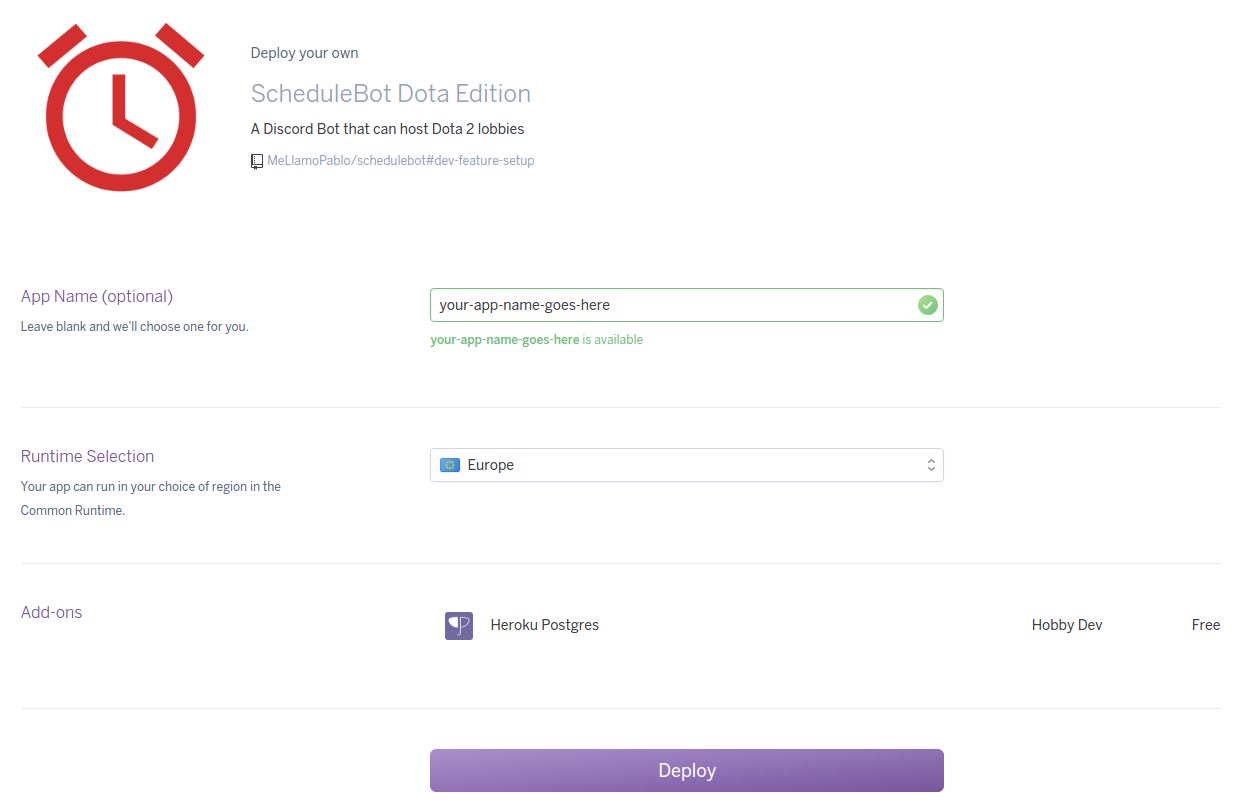
In order to deploy the bot to Heroku, simply click on the following button:
You'll be asked to log in or sign up. Then you'll be asked to choose an app name, and a server.
After that, you may press Deploy.

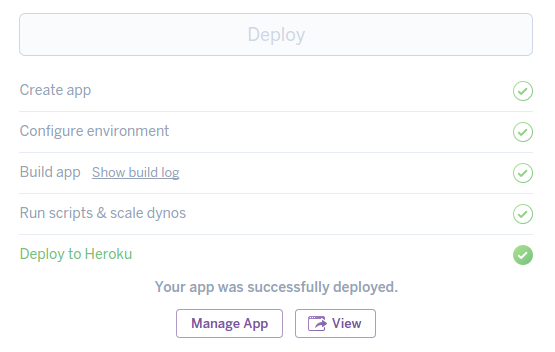
After you see the message Your app was successfully deployed, you can click View to enter the
Setup page.

Follow the instructions in that page and you'll have your bot up and running soon.
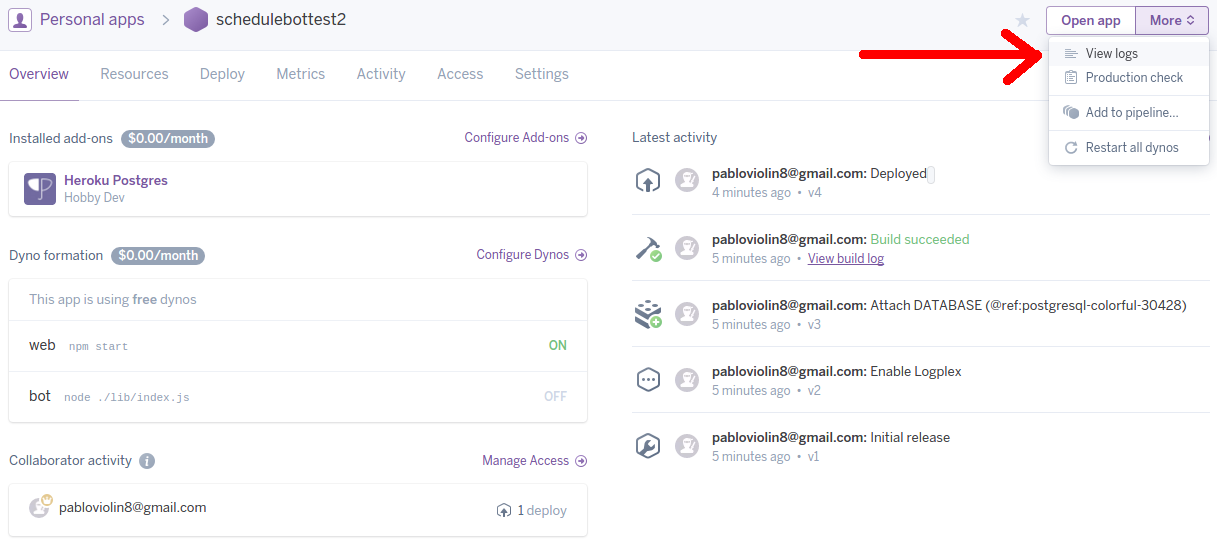
If you encountered any problems, you should check the app logs. In order to get there, click Manage
App, and in that panel, go to the right corner, click on More, and then View logs:
